
If you missed the recent show from the aurora borealis (or northern lights, as they're known in the northern hemisphere), fear not – we could be on the cusp of a repeat during the week starting June 3.
Although there are absolutely no guarantees, the part of the sun that caused a G5 geomagnetic storm (the strongest since 2003) last month has returned to face Earth. And the good news is that it’s still active.
According to NASA, the sunspot AR3697 (formerly known as AR3664) let rip an X-class solar flare, rated at X1.4, on May 29. Aurora is caused by the solar wind accelerating down the field lines of our planet’s magnetosphere – which is Earth’s armor against charged particles spewed into space by the sun.
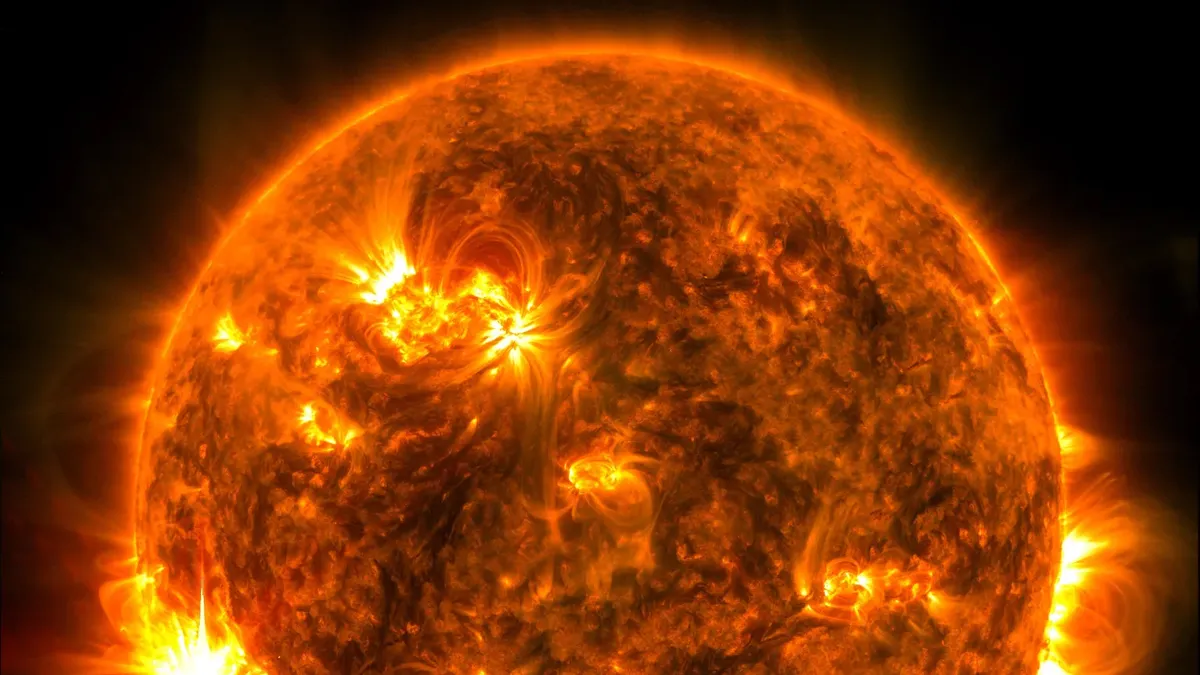
The solar wind and the aurora are caused by what astronomers call coronal mass ejections (CMEs), clouds of charged particles that can be shot into space from the sun in the wake of a solar flare.
However, when an active region faces Earth, a window of opportunity for aurora opens. The sun rotates every 27 days, so June 6 is exactly one sun cycle since May 10’s display. As luck would have it, that’s the date of the new moon, which means dark skies at night.
This means that, weather permitting, there could be opportunities to see and shoot the northern lights a few days either side of that date. Here's how to stay up to date on the potential opportunities and prepare to photograph them with a camera or phone...
5 steps for planning Northern Lights photos
1. Check the conditions
Who do you rely on to tell you that there’s about to be a massive geomagnetic storm? It’s social media – but you have to be so very careful. There's a lot of misinformation and cult-like social media accounts surrounding the aurora.
If you hear the words “kill shot” or any chat about the weakness of Earth’s magnetic field, run a mile. Rely only on solar physicists and expert aurora hunters who do this as a career and a passion.
Here are the best websites and X (formerly Twitter) feeds to follow for up-to-the-minute information about incoming space weather:
The best websites and apps

The best social media accounts to follow

- Dr. Ryan French (@RyanJFrench): British Solar Astrophysicist at the National Solar Observatory and author of The Sun: Beginner’s Guide to Our Local Star.
- Sara Housseal (@SNHWx), Operational Space Wx Forecaster & Meteorologist at Johns Hopkins University and a Master’s Student at Millersville University.
- Vincent Ledvina (@Vincent_Ledvina): “The Aurora Guy,” a northern lights photographer in Alaska and a Space Physics PhD student at the UAF Geophysical Institute.
A well as a reliable warning about incoming space weather, you'll also need a clear sky. If there are clouds, it makes no difference how strong the geomagnetic storm is – you’ll see nothing. So consult the best travel and weather apps, such as Windy, for the latest guidance.
2. Find the right location
Although hours of darkness are few at northern latitudes in the northern hemisphere, it’s wise to have somewhere in mind to drive to for midnight just in case a strong display of aurora is forecast.
A great place to consult before any other is the Find A Dark Place on the DarkSky website, which details all the certified International Dark Sky Places. These are protected land and night skies in 22 countries on six continents, from Arches National Park in Utah and Cherry Springs State Park in Pennsylvania to Aoraki Mackenzie in New Zealand and Elan Valley in mid-Wales.

However, you don’t need to go somewhere with protected sky – anywhere about 40 miles from a city should have a reasonably dark sky. A light pollution map and GoStargazing are both useful for locating pockets of darkness.
Remember that it doesn’t get dark until about midnight at mid-northern latitudes in June. That will make a difference by narrowing the window of opportunity nightly. For example, the aurora was spotted before midnight on May 10 in the UK. If a powerful geomagnetic storm strikes again this week in early June, it’s going to be after midnight that the aurora becomes visible.
3. Plan your shot
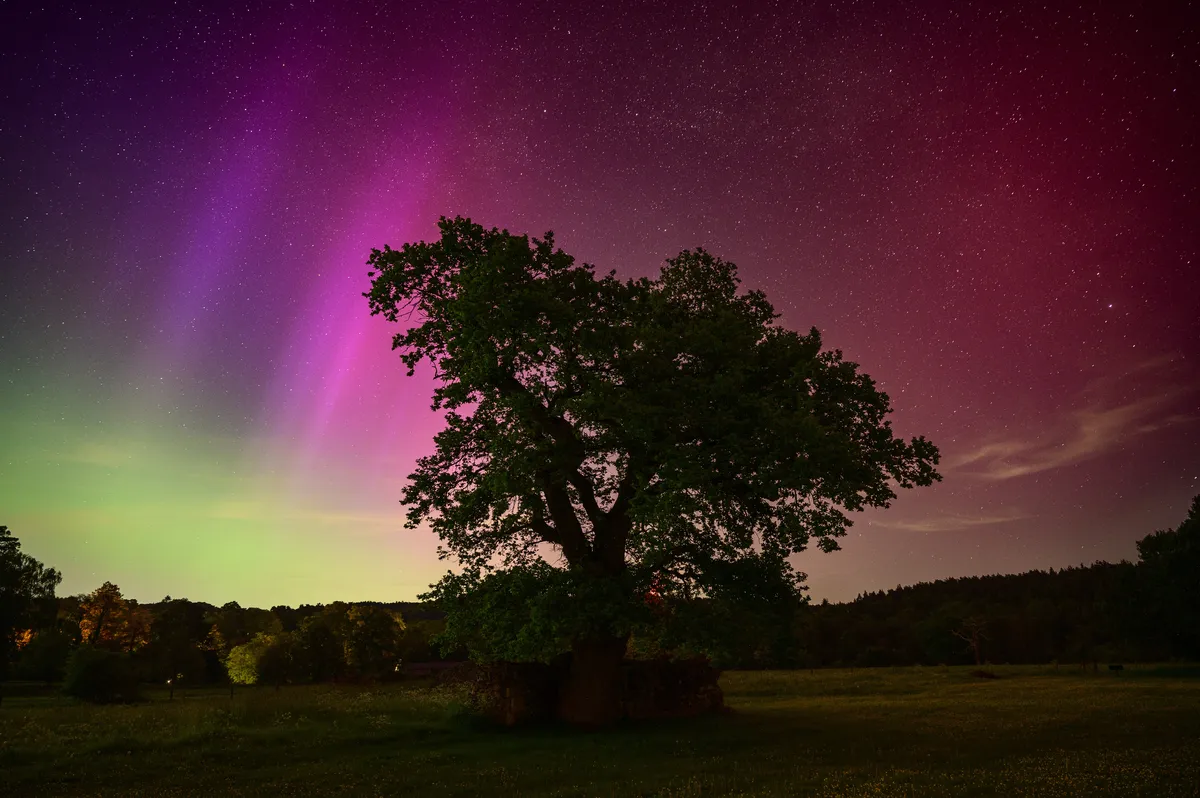
When the aurora appears in the skies above, it's tempting just to take a shot. Any shot, just to prove you saw it. That's completely understandable, but it's not how to take a memorable image of the aurora. Go look at any news articles about the aurora, and you'll find that most of them include landscapes or people. Or both.
If you have the luxury of time to think about where you might want to photograph the aurora, try to get something interesting in the foreground – such as the silhouette of a gnarly tree, a building or a lake (for reflections), or crowds of people watching the aurora.

It’s wise to think about the direction of the aurora. Typically, they appear in an oval around the Arctic or Antarctic circles. If a geomagnetic storm is particularly strong, that oval stretches to more southerly latitudes in the northern hemisphere and two more northerly latitudes in the southern hemisphere.
That means the northern lights are typically seen in the northern sky, and the southern lights are in the southern sky. It's something to remember when planning a shot – and this is where planning apps like PhotoPills, The Photographer's Ephemeris and Planit Pro come in handy. However, the fact is that May 10’s geomagnetic storm was so strong that the aurora was visible to the south in the northern parts of the U.K.
Dark skies aren’t everything. Aurora are captured using long exposures of a few seconds or more – depending on their brightness – so it is possible to image them in cities. May’s displays proved that. It’s also true that post-production can be used to remove the unwanted effects of too much sky glare.
It may be that you actively want to photography the aurora in an unexpected place, such as a city. However, it's best to keep away from bright light sources, such as street lights, security lights and the always-on office lights of city centers. And that can be hard to do.
4. Gather your equipment
Yes, you can shoot the northern lights using a smartphone. They’re ideal for making sure that what you can see is, in fact, an aurora and not a cloud. The fabulous reds and greens you see in images from May 10 look far more vibrant to a camera than to the human eye, which sees mostly grey.
A handheld smartphone will do in a pinch, and it's useful for checking that Aurora is present. But for a good, memorable shot, you still ideally need a tripod. That applies to both a smartphone and a manual mirrorless or DSLR camera.

For the latter, use a wide-angle lens with as wide an aperture as possible (for example, a 14mm lens and an aperture of around f/2.8). A spare battery or two and a small head torch will also be useful.
5. Prep the best settings
The best settings for the aurora will depend not only sky conditions but also on what time of night they appear and how bright they are. However, you're looking at a long exposure of at least a few seconds and maybe as long as 20 seconds. Hence, the tripod.

Set the lens to infinity focus, shoot in raw and use a white balance of about 3500K to 4000K. Benchmark settings to begin your experiments would be ISO 800, a shutter speed of somewhere between 5 and 20 seconds (for a bright-dim aurora), at an aperture of f/2.8. Shoot in raw and post-process to bring out the color, though be wary of making the greens and reds too vibrant.
For smartphones, ‘night mode’ is the best choice. If you can control the exposure, experiment with a few to 10 seconds. It’s worth considering using one of the best camera apps like Halide or a dedicated astrophotography mode, like the one on Google Pixel phones.
You might also like
https://news.google.com/rss/articles/CBMieGh0dHBzOi8vd3d3LnRlY2hyYWRhci5jb20vY2FtZXJhcy9waG90b2dyYXBoeS90aGUtbm9ydGhlcm4tbGlnaHRzLWNvdWxkLXJldHVybi10aGlzLXdlZWstNS13YXlzLXRvLXBsYW4teW91ci1waG90by1zaG9vdNIBAA?oc=5
2024-06-02 08:00:00Z
CBMieGh0dHBzOi8vd3d3LnRlY2hyYWRhci5jb20vY2FtZXJhcy9waG90b2dyYXBoeS90aGUtbm9ydGhlcm4tbGlnaHRzLWNvdWxkLXJldHVybi10aGlzLXdlZWstNS13YXlzLXRvLXBsYW4teW91ci1waG90by1zaG9vdNIBAA
Tidak ada komentar:
Posting Komentar